Listen to the Podcast
6 May 2022 - Podcast #791 - (22:27)
It's Like NPR on the Web
If you find the information TechByter Worldwide provides useful or interesting, please consider a contribution.

If you find the information TechByter Worldwide provides useful or interesting, please consider a contribution.
A directory inside the Windows directory contains many useful functions. Perhaps you've seen System32 and wondered what's in there. System32 has been a part of Windows for many years, possibly from the beginning. The "32" part of the name suggests that the components are 32-bit applications, meaning that they're probably not new. But what do the files do?
You'll fine more than 4700 files and folders. PNG image files, dynamic link library files (DLL), some settings files, control panel components, some Visual Basic files, a few XML documents, and more than 600 application files with EXE extensions. It's the EXE files we're interested in.
Click any small image for a full-size view. To dismiss the larger image, press ESC or tap outside the image.
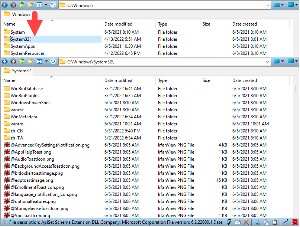
 The SYSTEM32 directory is inside the Windows directory. You can find it with the Windows File Explorer, but I prefer to use Q-Dir because of its ability to filter the files that are shown.
Here's how the filtering works: Start by clicking the (1) filter/highlight icon in Q-Dir. Then (2) type *.exe in the text box to limit the display to just application files. Click the (3) selector at the right of the text box and choose (4) "Be a filter" from the drop-down list. Then the number of visible objects will drop from more than 4700 to around 650.
Avoid wandering through the System32 directory and randomly clicking executable files to see what they do. Compare this to wandering through a big-box store, opening random containers, and drinking the contents. You might consume a tasty ale or apple juice, of course, but you also might find that you have consumed toilet bowl cleaner or furniture polish. All of these have uses and are fine when used properly, but the consequences may be severe when they're misused. Also take care not to rename, delete, or edit any of the files in the System32 directory.
Before double-clicking a file, find out what it does!
So use Google or DuckDuckGo to ask what is XXX.EXE?" Let's say I've seen ALG.EXE and wonder what it is. Might it be an algebra tutor? Well, no. ALG.EXE is the Application Layer Gateway service, a Windows component. It is required if you use a third-party firewall or Internet Connection Sharing (ICS) to connect to the internet. This is not an application you'll want to run just to see what it does. It's unlikely to cause any harm, but it certainly won't be helpful.
An even better resource is Microsoft's documentation site, where you can search for the System32 applications. Not all applications are documented there, though, so a search engine is sometimes the only resource.
Also, not all of the applications in System32 can be run by double-clicking them. Or, perhaps more accurately, double-clicking them may not provide any useful response because they're intended to be used from the command line. Take CLIP.EXE for example: It redirects the command output from the command line to the Windows clipboard. Use it to copy data directly into any application that can receive text from the clipboard. You can also paste this text output into other programs. This is also a good time to say that the name of a command doesn't always accurately describe what it does. This may be, in part, because most of the applications comply with the old DOS 8.3 file naming convention where the name of the file is no longer than eight characters and the extension is three characters.
You'll find familiar files in System32 such as CHKDSK.EXE that's used to analyze a disk for errors. DIALER.EXE is the antique component that can dial a phone number if a phone line is connected to the computer. FTP.EXE is the built-in file transfer protocol application. FONDUE.EXE won't cook a tasty meal for you, though. It's the Windows Features on Demand User Experience component.
If you've ever used the Event Viewer by pressing the Windows key, typing "event", and then selecting the Event Viewer App, EVENTVWR.EXE is what Windows located and launched for you, and it's in System32. Likewise the old-style Control Panel (CONTROL.EXE). There's even FINGER.EXE and, no, it's not a gesture to make when the computer is misbehaving. It's the TCP/IP Finger Command, which has been around since 1977 and is intended to provide information about a particular user on a Unix operating system. It's likely that most computer users will never encounter it.
Let's consider some of the components that are useful, maybe even functions that you've used but never knew where they were located.
 PSR.EXE is one of the most useful components in System32. It's the Problem Steps Recorder, and it's one way for you to share information when something goes wrong with your computer. I prefer using an application such as AeroAdmin to share my screen or to view someone else's screen, but the Problem Steps Recorder watches what you do when you set it to record, captures screen shots for each action you take, and bundles all of the information into a single compressed file that you can share with a technician.
 CHARMAP.EXE is one of the System32 applications you may already have encountered. Many of the typefaces included with or added to Windows include more than the standard 255 ASCII characters. If you need to use one of those characters the Character Map application displays them and provides a way to copy them to paste into a word processor or other program.
 SIGVERIF.EXE is the File Signature Verification application and it's an application you won't use unless you suspect that malware has made its way onto your computer. It checks the validity of device drivers. Device drivers are programs that control or helps operate a hardware device. They are essential, but they are also the source of many problems. SIGVERIF.EXE was added to Windows 7 to allow users to confirm that device drivers are "signed". Running SIGVERIF.EXE will examine all device drivers. Ideally, the result will be a message that all device drivers have been signed, but the more likely result will be a list of drivers that have not been digitally signed. If you suspect a problem with drivers that have been installed by malware, this list is a good starting point.
 DXDIAG.EXE is a tool that collects information about devices to help troubleshoot problems with DirectX sound and video. DirectX has been around since 1996. It give games and other applications that need it low-level access to the computer's video and audio hardware. Starting with Windows 95, Microsoft restricted access to hardware to improve security, so games could no longer interact with low-level hardware features. To restore access, Microsoft introduced DirectX. If you suspect problems with DirectX, DXDIAG.EXE provides information about all input and output devices. This information can be saved to a file and provided to a support technician.
 CALC.EXE is the built-in calculator function. There are automatic functions for currency, volume, and length conversions as well as settings to switch between standard, scientific, graphing, and programmer versions. There's even a handy date calculator that tells me I'm a little over 27 thousand days old. It's actually a most useful application.
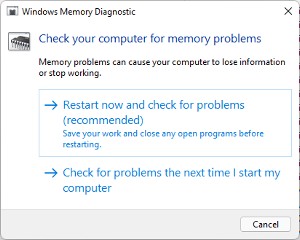 MDSCHED.EXE is a memory diagnostic tool. When a computer behaves erratically, the root cause might be failing memory. A computer that crashes with a blue screen, hangs, freezes, or reboots without warning probably has a hardware problem of some sort. MDSCHED is short for Memory Diagnostic Scheduler. Because the computer's memory can't be tested when an operating system is running, the computer needs to be rebooted. The test can be run immediately, which requires an immediate reboot, or scheduled to run the next time you start the computer. The Memory Diagnostic thoroughly tests the computer's RAM to identify problems.
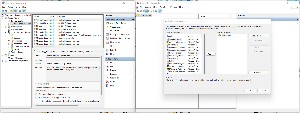 MMC.EXE is a utility for building a Computer Management Console. Perhaps you've already used the predefined console (left) and you've wished that other Windows management tools were present or that tools you never use were absent. The solution is MMC.EXE (right), which you can use to define a management console with exactly the tools that you want to have.
FC.EXE compares the contents of two files or sets of files and displays the differences between them. This is a utility that must be run from the command line, and it has a lot of switches that you can see by typing fc /? at the command prompt.
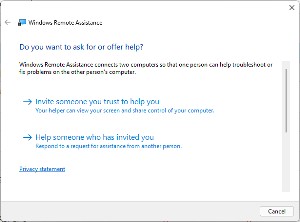 MSRA.EXE is a screen sharing utility that allows a remote computer user to see another computer user's screen. Although the utility is built in to Windows, my preference is AeroAdmin, which is free for up to 17 hours and 20 connections per month.
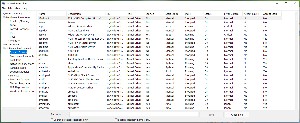 MSINFO32.EXE gathers information about the computer and displays a comprehensive view of the hardware, system components, and software environment. This information is helpful in diagnosing problems. To share the results with a technician, export the information to an NFO or TXT file.
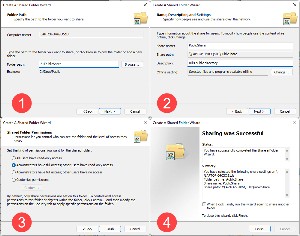 SHRPUBW.EXE can be helpful if you've had a problem sharing a drive on your home network. I saved this one for last because it needs a bit more explanation. It's not uncommon for someone to get one or more of the settings wrong when trying to set up a shared directory manually.
The wizard will even take care of firewall settings, which is a common cause of failures. The user needs to provide (1) the location of the directory you want to share. If the directory already exists, you can use the Browse button to locate it. To create a new directory, just fill in its location, such as E:\PublicShare, which will create the directory PublicShare on drive E. Then (2) fill in the share name (I used "PublicShare") and write a description (I used "Bill's public directory").
 The next step involves determining what (3) permissions users will have: read-only for everyone, full access for administrators and read-only access (or no access for others), or customized permissions.
Be sure to take note of the (4) share path. This is what other users on your home network will need to gain access to the directory.
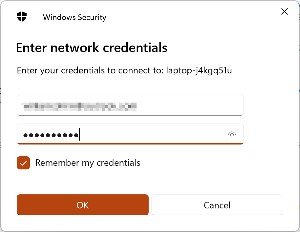
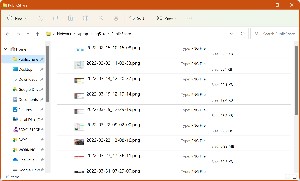
After specifying the share path, users will need to enter a user name and password that has been defined on the computer where the shared directory is located. Clicking Remember my credentials will save the password so that future access will be automatic. It's also wise for the user to add the shared location to the Favorites section of the Windows File Explorer to avoid the need to type the long share path each time.
The Windows System32 directory houses lots of useful functions. Just keep my earlier caution in mind and don't run one of the applications just to see what it will do. Find out what it does first and then proceed.
From the looks of the physical desktop beside my primary computer, you might be surprised to learn that I'm a stickler for a clean Windows desktop. That puts me at the diametrically opposed end of the spectrum from those who have an icon for every installed application on the computer, along with links to websites and documents, on their desktop.
Click any small image for a full-size view. To dismiss the larger image, press ESC or tap outside the image.

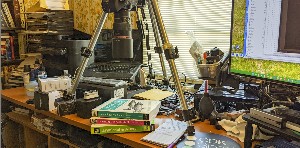 << My Computer Desktop • My Physical Desktop >>
There's nothing wrong with either extreme or with any spot in the middle. I maintain a busy Task Bar even though Windows 11 means that I can no longer have 100+ icons there. The Task Bar now has about 40 icons, and I might eliminate some of those because Windows 11, along with Microsoft PowerToys, offer better options. Those 100+ icons on the Task Bar were small and it was common for me to spend too much time trying to locate the appropriate icon for an application I use infrequently.
Besides severely limiting the number of items on the Task Bar after installing Windows 11, I also eliminated nearly all of the icons on the Desktop. The Recycle Bin is present and I keep a link to the GoodSync Explorer because it allows me to view remote locations that are linked via GoodSync. There are three links to command files: One to reboot the computer, one to shut down the computer, and one to abort the reboot or shutdown process. There's also a folder with links to several utilities that I use often. There's also one jpeg file that I keep on the desktop because it's a good example of a graphic that's intended to illustrate a process. Otherwise, the Desktop is bare.
The PatchMyPC utility runs each day to keep 40 or so utility programs up to date and it's set to delete any desktop icons that updated utilities may have created. When other application updates such as those for Adobe Creative Cloud put icons on the desktop, I delete them immediately.
And just to be sure that the icons allowed on the Desktop stay where I put them, I run Desktop OK each time the computer is booted. If something has been moved, Desktop OK puts it back where it belongs.
As I said at the outset, there's nothing wrong with having a lot of icons on the Desktop and I'm not trying to convince anyone that there's a better way. But there's a better way for me. The better way involves the Windows 11 Start Menu and the PowerToys Run feature that I described in mid-April in a longer piece about PowerToys in general.
 Part one is the revamped Windows Start menu. Apps that are pinned to the Start Menu can be moved around easily so that the ones you use the most will be on the first screen. I have three screens of pinned apps, so around 45 applications are there. As with previous versions of Windows, recently used apps and files, along with any app that's been installed recently will appear in the "Recommended" list.
If you don't care for the Recommended section, it can be removed by going to Settings > Personalization > Start Page and turning off Show recently added apps, Show most used apps, and Show recently opened items in Start, Jump Lists, and File Explorer. Unfortunately, this doesn't allow the pinned apps section to expand and there's just a large blank area at the bottom. A hint, Microsoft: Fix this.
 Part two is PowerToys Run. When this feature is active, pressing Alt-Spacebar opens a dialog box where you can type any part of an application's name. To run Affinity Designer, I could type "aff" to get a list of Affinity applications, or "design" to get a list of applications with "design" in their names.
If the application you want to run is highlighted, you can start it by pressing Enter. If not, use the arrow keys to position the highlight and press Enter or use the mouse to click the application you want to run.
I've maintained a clean Desktop for a long time, but even those who have filled theirs with every installed application might find value in using these techniques with a clean Desktop or a cluttered Desktop. It's not about right or wrong; it's about what works best for you..
Cameras in mobile phones are amazing. They can take still photos. They can create videos. Some can even figure out which pixels form the foreground image and then blur the pixels that form the background part of the image. Android's "Top Shot" feature creates a series of photos when it detects motion and then lets the user pick the best one. But sometimes that gets in the way.
Click any small image for a full-size view. To dismiss the larger image, press ESC or tap outside the image.

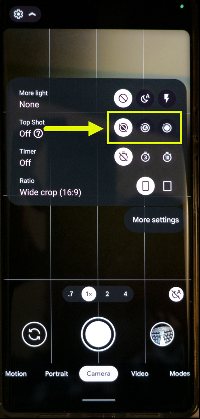 Many Android phones switch from picture mode to video mode when the user holds down the shutter button. If you get a series of photos instead of an individual image, this may be Top Shot at work, and this feature can be turned off.
The feature, and even its presence, will vary depending on the phone's manufacturer, the model of the phone, and even the installed version of Android. It's present in the Android photo app and may or may not be present in other photo apps that you've installed.
But enough warnings and weasel words. Here's how to find out if it's present and how to enable or disable it.
With the photo app open, tap the gear icon at the top left. This will open the settings menu. Choose the Top Shot setting you prefer: OFF (the feature is never used), AUTO (the feature is used when the application senses motion), and ON (the feature is always enabled).
When the camera app has created a series of images, it will initially appear as a short video. Tap the three vertical dots in the upper right corner of the screen to open information panel. Tiny thumbnails in a ribbon will show the shots in the photo. To see them in full-size view, tap the ribbon. One image will be shown as the one the app recommends, but the user can scroll through the images, make another choice, and save that option as the photo to use.